
On this page
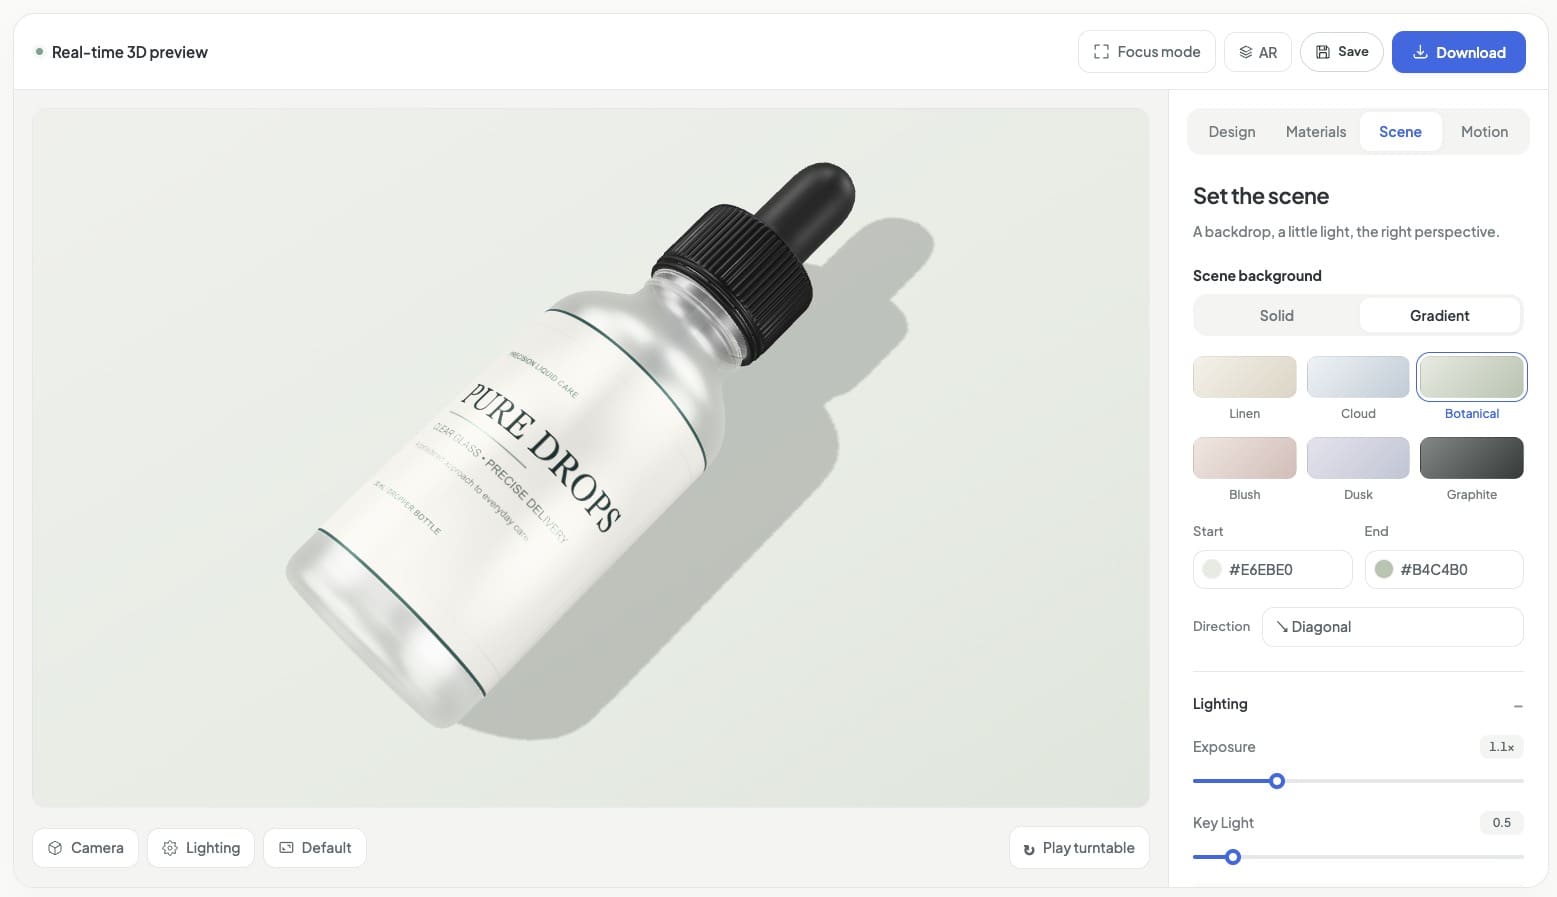
When you open a mockup, you’re stepping into a small 3D studio.
The product is already there, ready for your artwork, colors, and ideas.
You can turn it around, change its appearance, and choose how to present it.
This guide introduces the main parts of the Mockaps editor so you know where to go and what to try first.
You do not need any 3D experience to follow along.
Open a mockup and get your bearings
First, choose a template from the mockup library.
If you’d like an example to explore, open the Disposable Paper Cup 3D Mockup.
Wait for the model to finish loading before you begin.
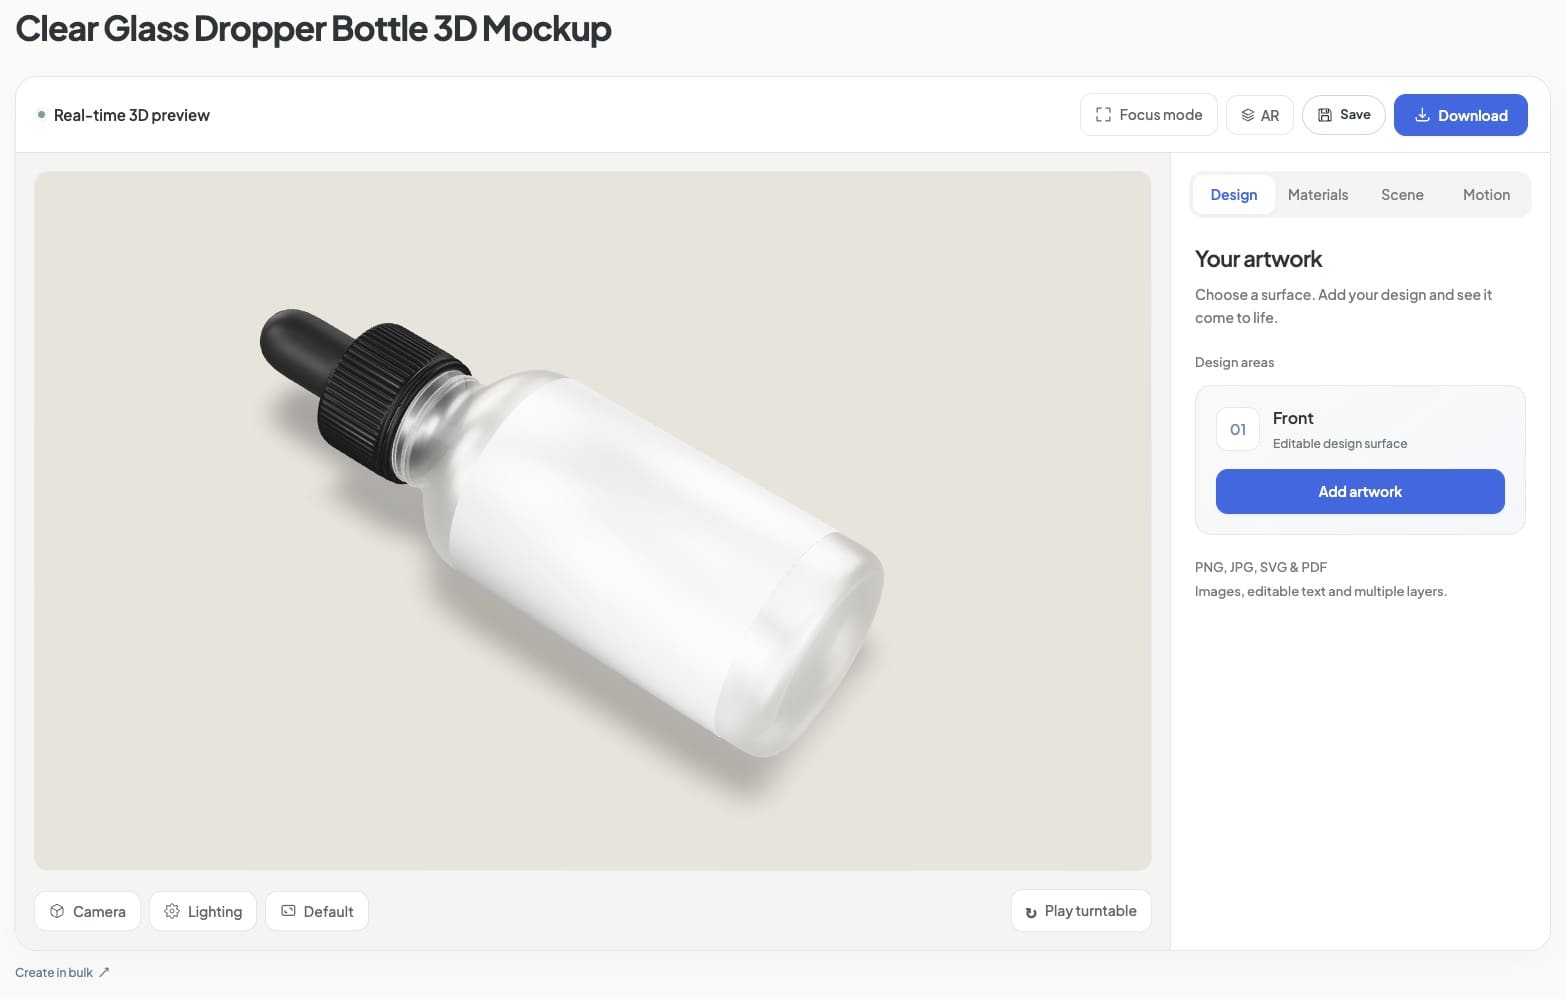
The editor has two main parts: the 3D preview and the settings panels.
The preview shows the product, while the panels give you control over its artwork, materials, scene, and movement.
On a smaller screen, you may need to scroll to reach some controls.
Each template starts with its own model and settings, so the available surfaces, materials, and animations can differ.
The 3D preview: see your changes as you work
The large product view is your main reference point.
As you edit, it shows how your artwork and scene look together.
Try dragging inside the preview to look around the model.
Then use the Camera menu to explore the available preset views.
Changing the view helps you inspect a design or choose an angle for your final image.
It does not move your uploaded artwork across the product.
You’ll also find a Lighting menu for trying lighting presets and a canvas-size control, which may initially say Default.
The canvas size changes the shape of your composition, so leave enough room around the product when choosing a different format.
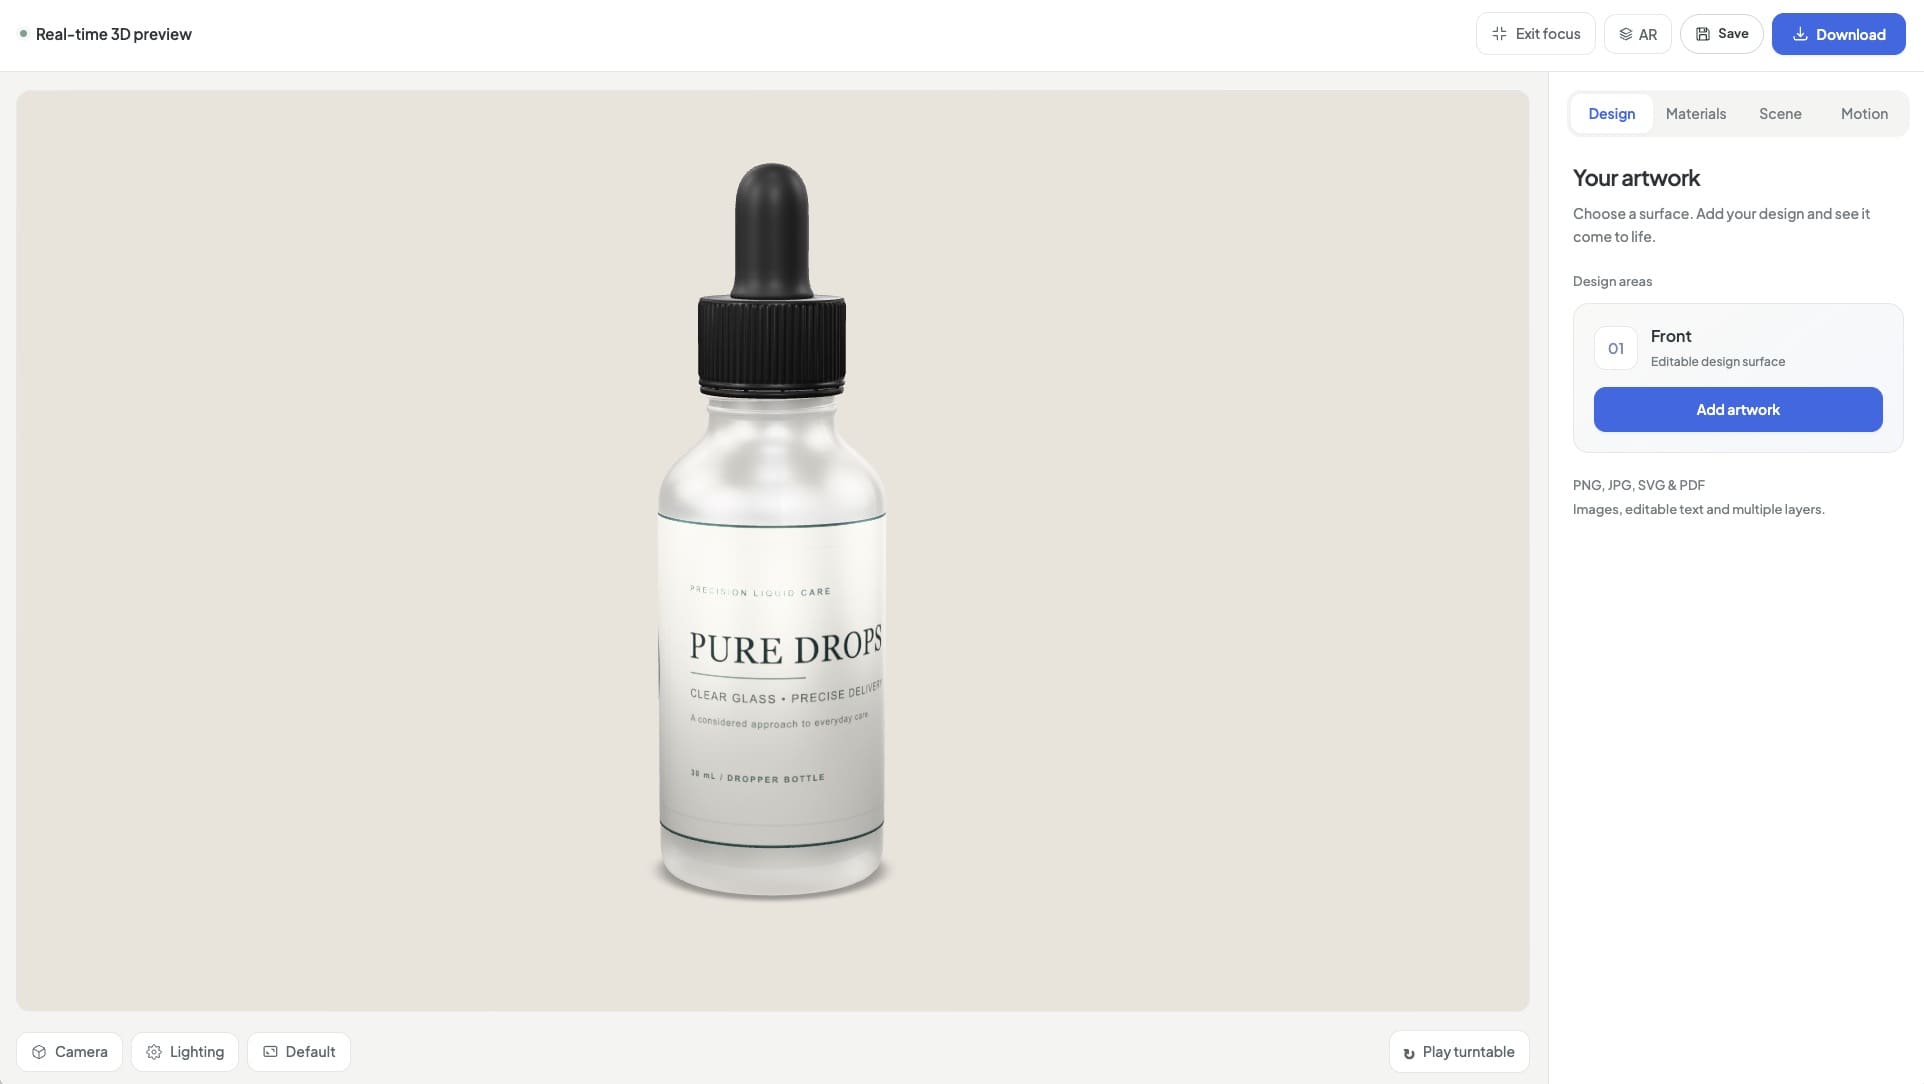
For a less crowded workspace, try Focus mode.
Once you have a comfortable view, move on to the four main settings tabs.
Design: add what goes on the product
Start with Design when you want to add a logo, label, photograph, pattern, or text.
Under Your artwork, the editor lists the template’s available design areas.
A cup may have one main artwork area, while a box can have several surfaces to work on.
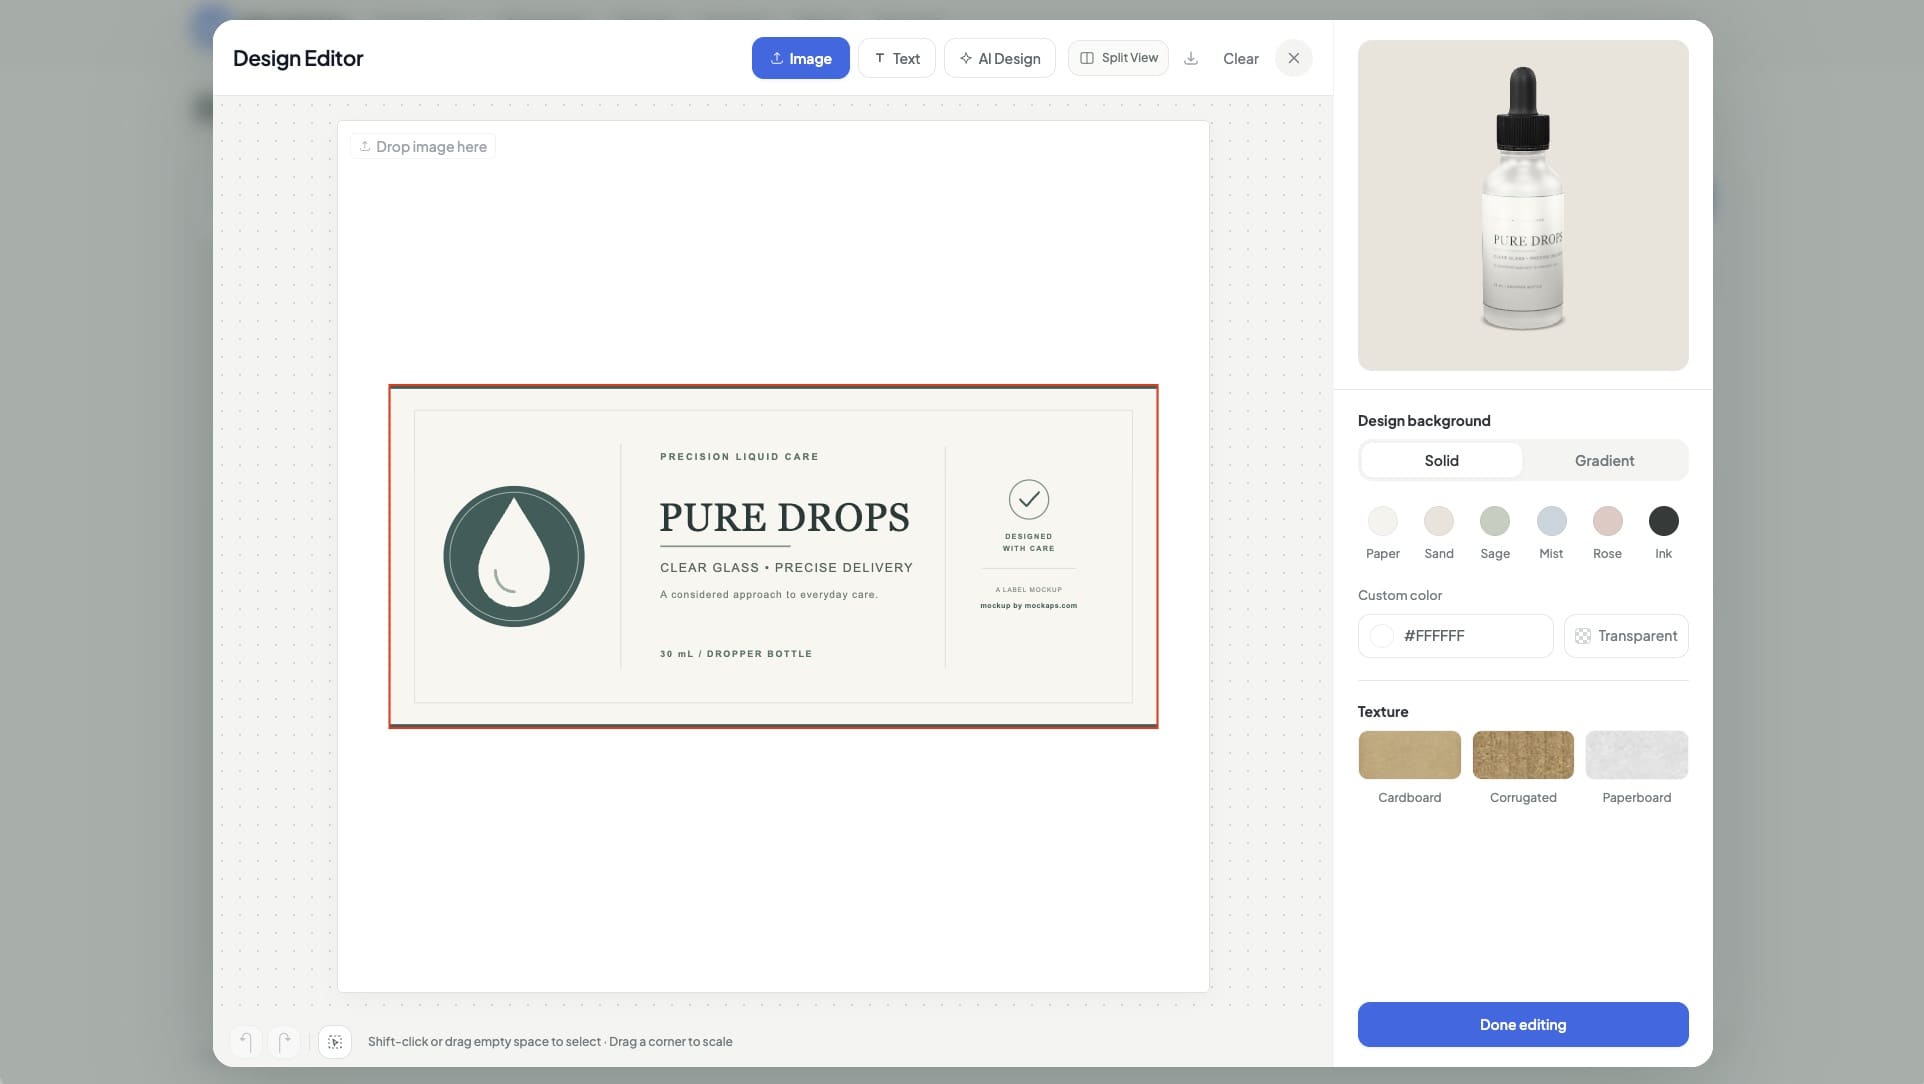
Choose an area, then select Add artwork to open the Design Editor.
Here, you work on a flat layout that maps onto the 3D product.
Use Add image or drag in a PNG, JPG, SVG, or PDF.
Alternatively, choose Add text to type directly into the design.
Then select an object to move it or drag a corner to adjust its size.
The editor also includes undo and redo controls, along with design background colors, gradients, and textures.
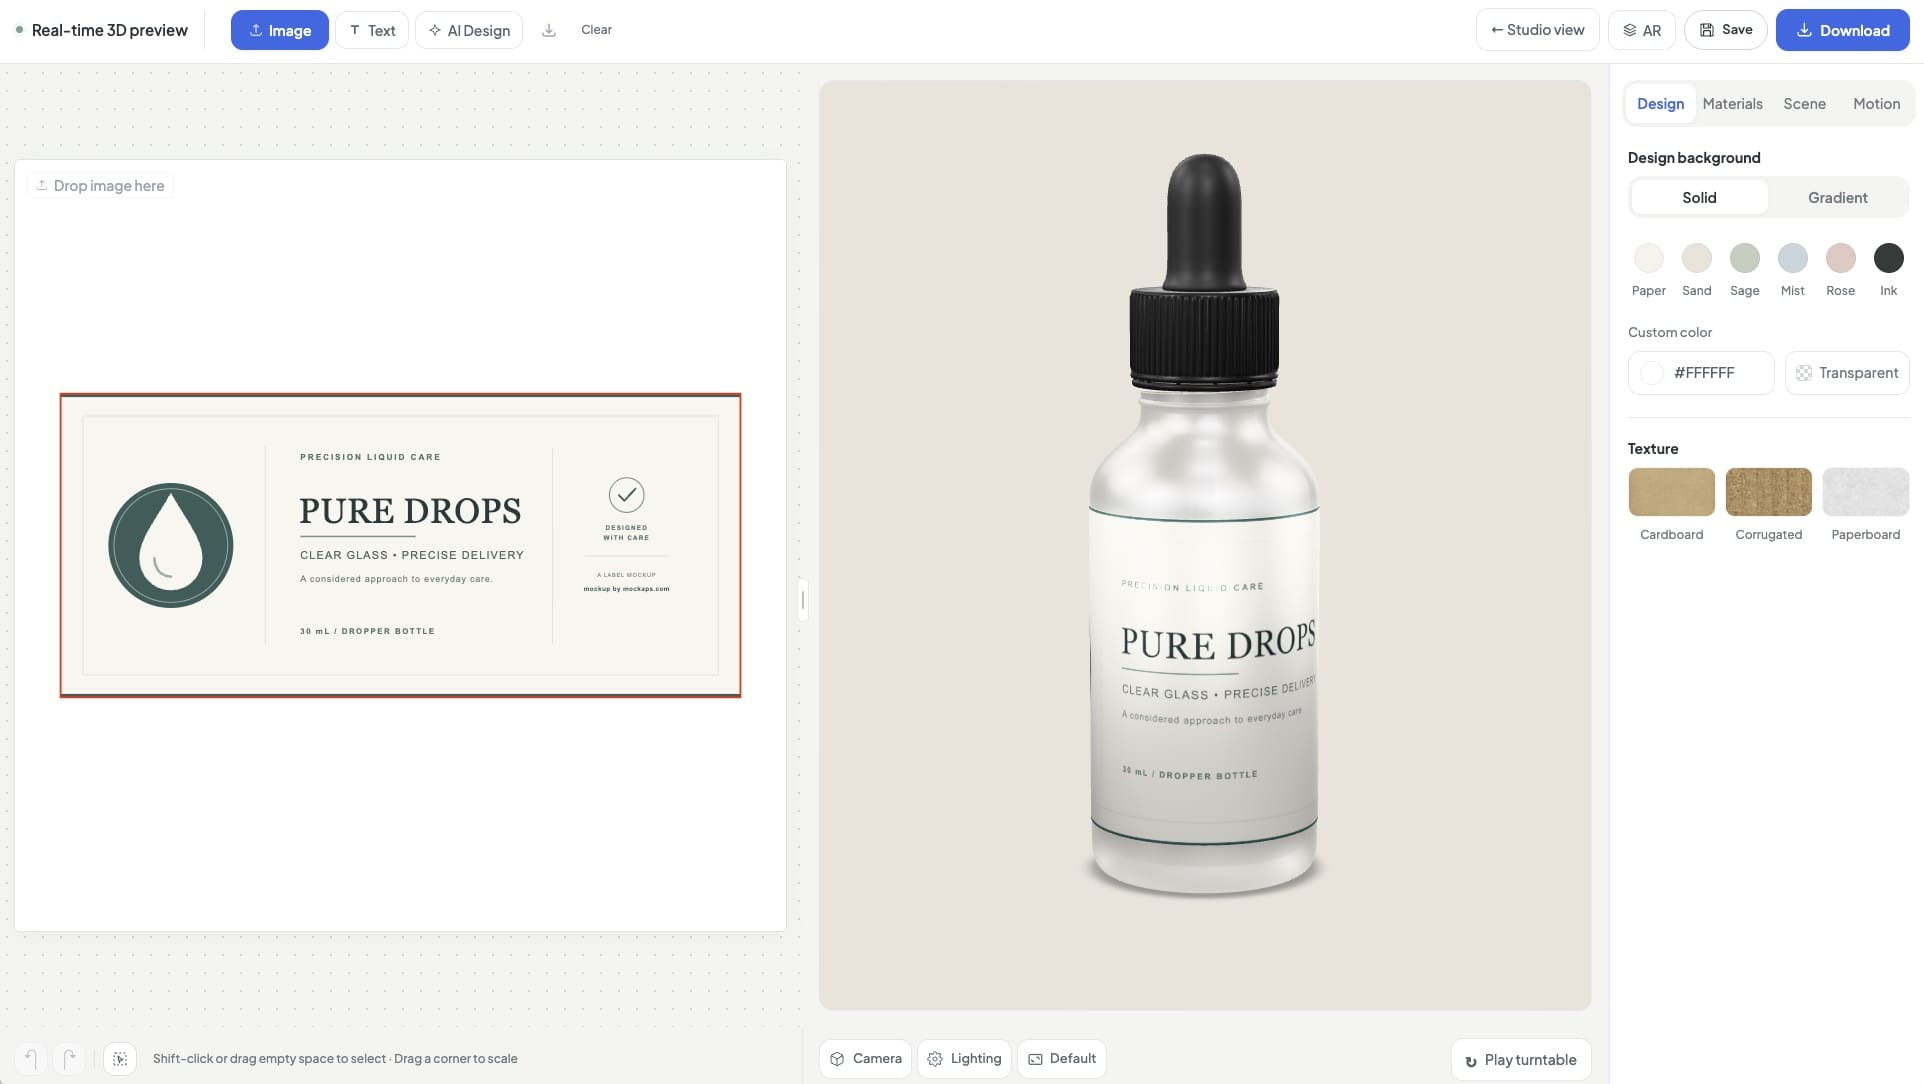
If you want to see the artwork and product together, switch to Split View.
When you’re ready to return to the main studio, choose Done editing.
Try this: add one small logo, then inspect it from the front and side before adding anything else.
Materials: change how the product’s surfaces look
Next, open Materials to change the appearance of the product itself.
First, choose a material from the selector.
The names depend on the template and may describe a label, cap, paper surface, or another part of the model.
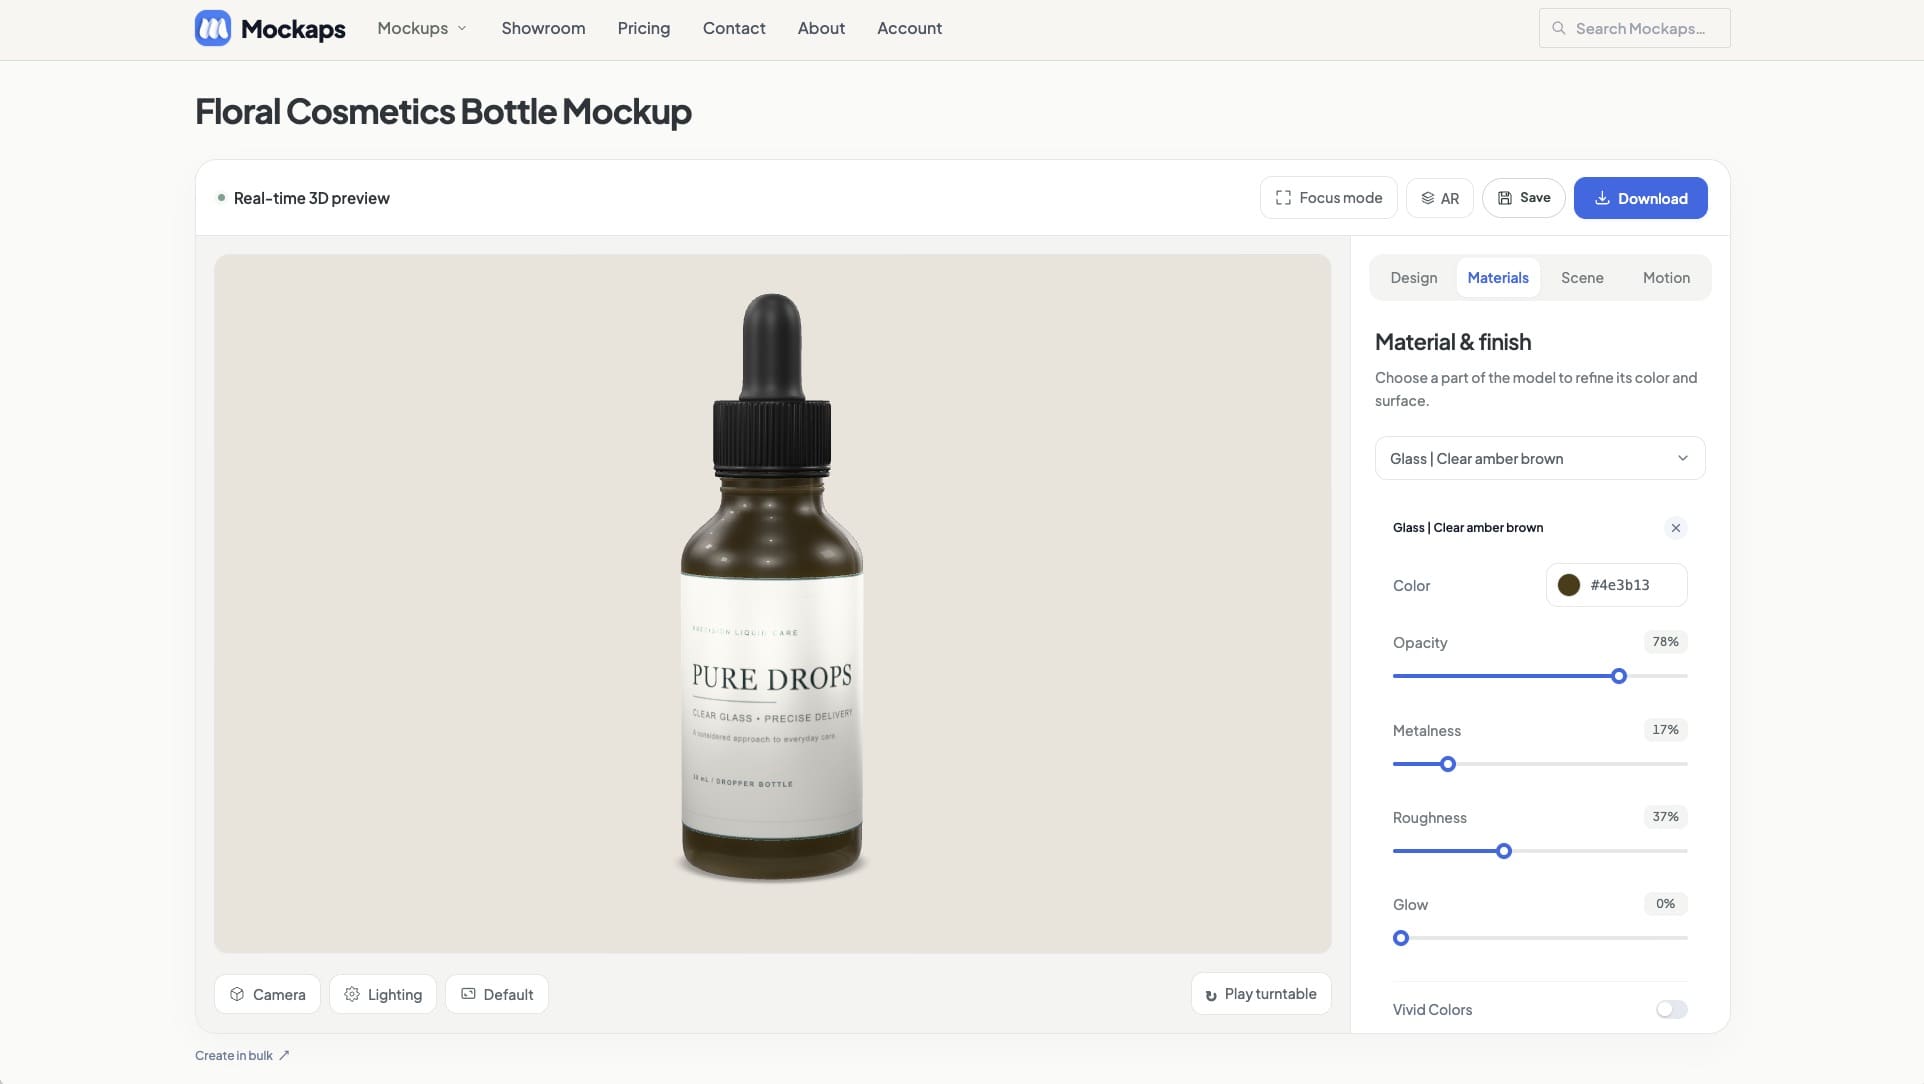
Then adjust the available color and finish controls.
- Color changes the material’s base color.
- Roughness affects how sharp or soft reflections look.
- Metalness changes how metallic the surface behaves.
- Opacity controls the material’s transparency.
- Glow adds an emissive appearance to the surface.
You do not need to adjust every slider.
For a first experiment, change one color or gently adjust roughness, then look at the result from another angle.
If an unexpected part changes, check which material is selected.
Several parts of a model can share the same material.
Scene: choose the setting around your product
Now, open Scene to shape the overall presentation.
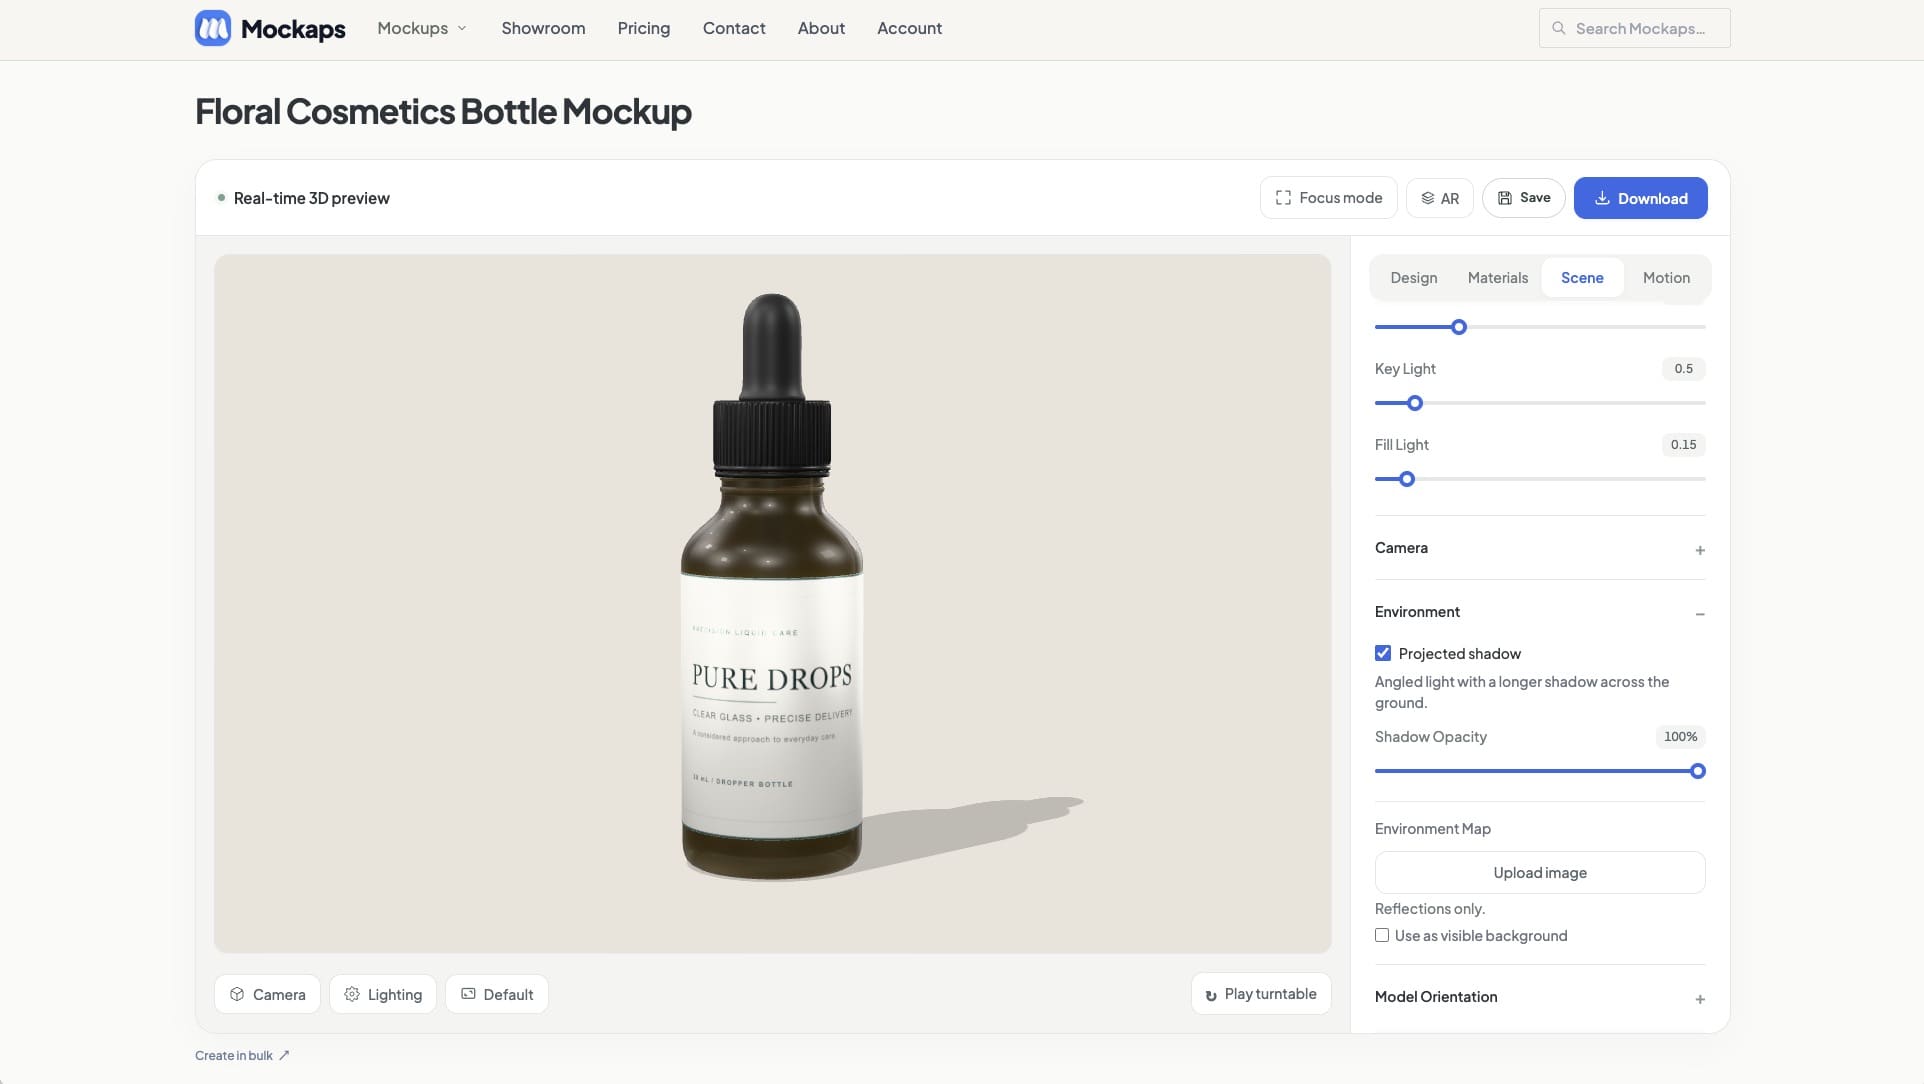
Start with the Scene background controls to choose a solid color or gradient.
Below these, you’ll find settings for lighting, the camera, the environment, and model orientation.
Some sections are collapsed, so select their headings to reveal the controls.
- Lighting: adjust exposure, key light, and fill light.
- Camera: adjust the field of view, which changes the perspective.
- Environment: explore shadow settings and an environment image for reflections.
- Model Orientation: change the product’s tilt and rotation.
For now, try a neutral background and a lighting preset that keeps your artwork easy to read.
After that, change one setting at a time so you can see what it does.
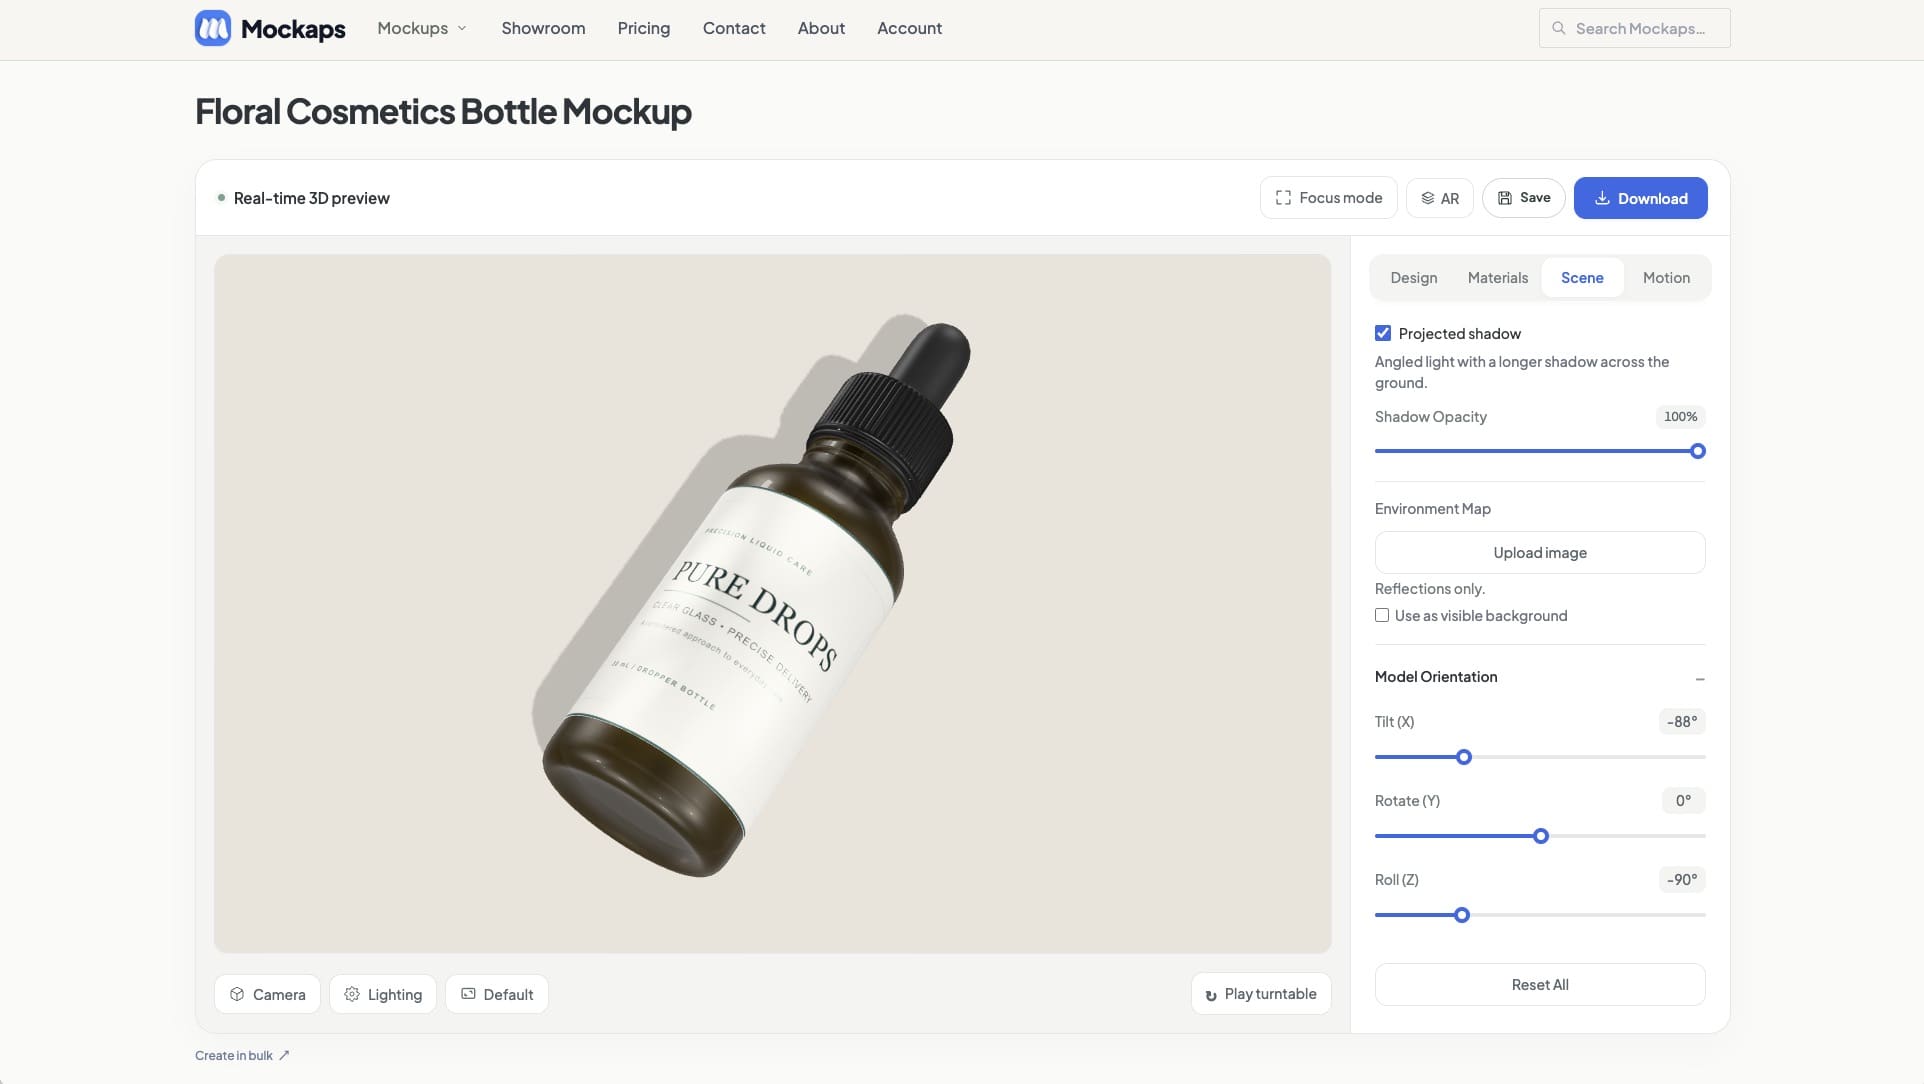
Which background or color should I change?
These controls can sound similar, but they affect different parts of the mockup.
| What you want to change | Where to look |
|---|---|
| The artwork or printed background on an editable surface | Design → Add artwork → Design background |
| The appearance of a product part, such as a cap or paper surface | Materials → Select material |
| The backdrop behind the whole product | Scene → Scene background |
For example, a blue scene background puts blue behind the cup.
To put blue on its artwork surface instead, change the design background.
Motion: make the mockup move
Once the still view looks good, open Motion if you want to explore animation.
Turntable creates a continuous orbit around the product.
Switch it on to see the design from different angles, then adjust the rotation speed if needed.
Camera Animation lets you build a sequence of views using keyframes.
A keyframe records a view in the sequence, and playback moves between those saved views.
Some templates also include their own model animation, such as a lid opening or packaging unfolding.
Those controls appear only when the template includes that animation.
Finally, Record captures movement in the 3D preview as a video with Pro access.
For a complete walkthrough, follow How to create 3D animated mockups.
You can leave Motion alone while making your first still image.
Save, download, or view in AR
The controls above the preview help you keep or use what you’ve made.
They each serve a different purpose.
Save your editable setup
Use Save mockup to your account when you want to continue working later.
Saving requires Pro access.
Save your changes before leaving, then reopen the project from your saved mockups when you return.
Download a finished file
Open Download to choose the output you need.
A standard JPG includes the scene background and is free to download.
A PNG provides a transparent background, while a GLB contains the customized 3D model with your artwork.
PNG, GLB, and higher-resolution image downloads require Pro, with model-download access details shown in the tool.
Downloading an image does not save an editable project to your account.
Check the current plans for included features and commercial-use access.
See the mockup in your space
Choose AR to prepare a real-world preview with Pro.
You can open it on a compatible phone or scan the QR code from your desktop.
This lets you place the customized model in your surroundings and look around it.
A simple first edit to try
You now know where the main controls live.
To put them together, try this small exercise:
- Open the paper cup mockup and wait for it to load.
- Go to Design, choose Add artwork, and add one image or a short line of text.
- Return to the studio and inspect the placement from several angles.
- Choose a simple background in Scene and compare the Lighting presets.
- Frame a view you like, then download a standard JPG.
That is enough to make your first finished mockup.
Afterwards, you can explore materials, build an animation, or create several views with the Bulk Mockup Generator.
Open the paper cup editor and try it, or choose a different mockup from the library.
KEEP EXPLORING
Need a hand with this guide? Ask a question ↗