
On this page
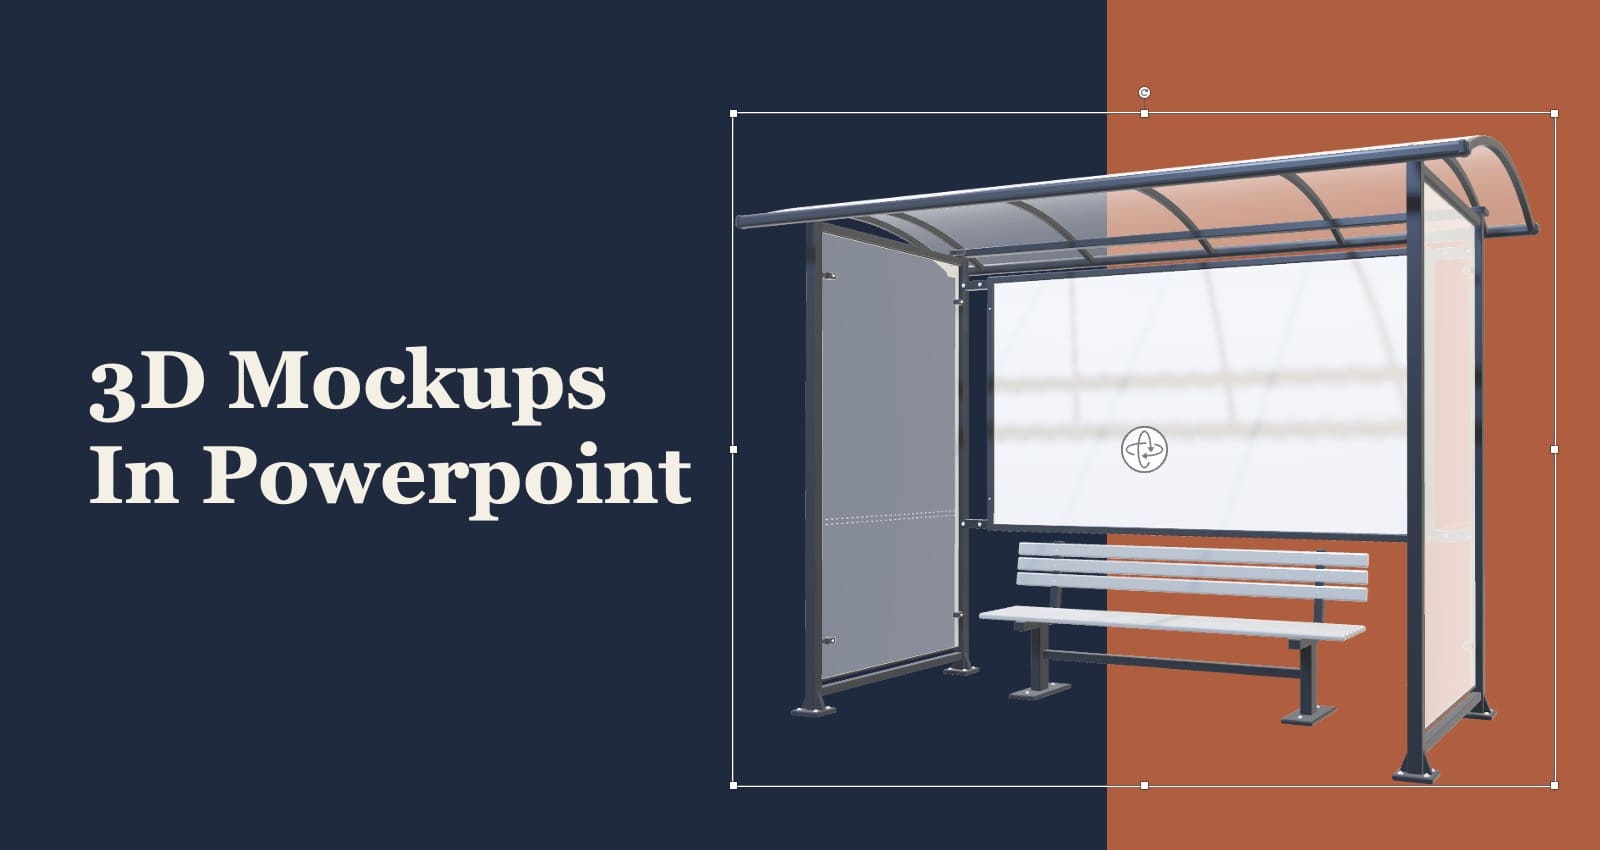
A 3D mockup can help people understand a product before they hold it in their hands.
For example, you could present a new book cover from several angles or show an app design on a laptop during a client meeting.
First prepare your mockup in Mockaps.
Then download it as a GLB file and add it to PowerPoint as a 3D model (drag and drop)
This guide takes you from your artwork to a presentation slide, with an optional animation between views.
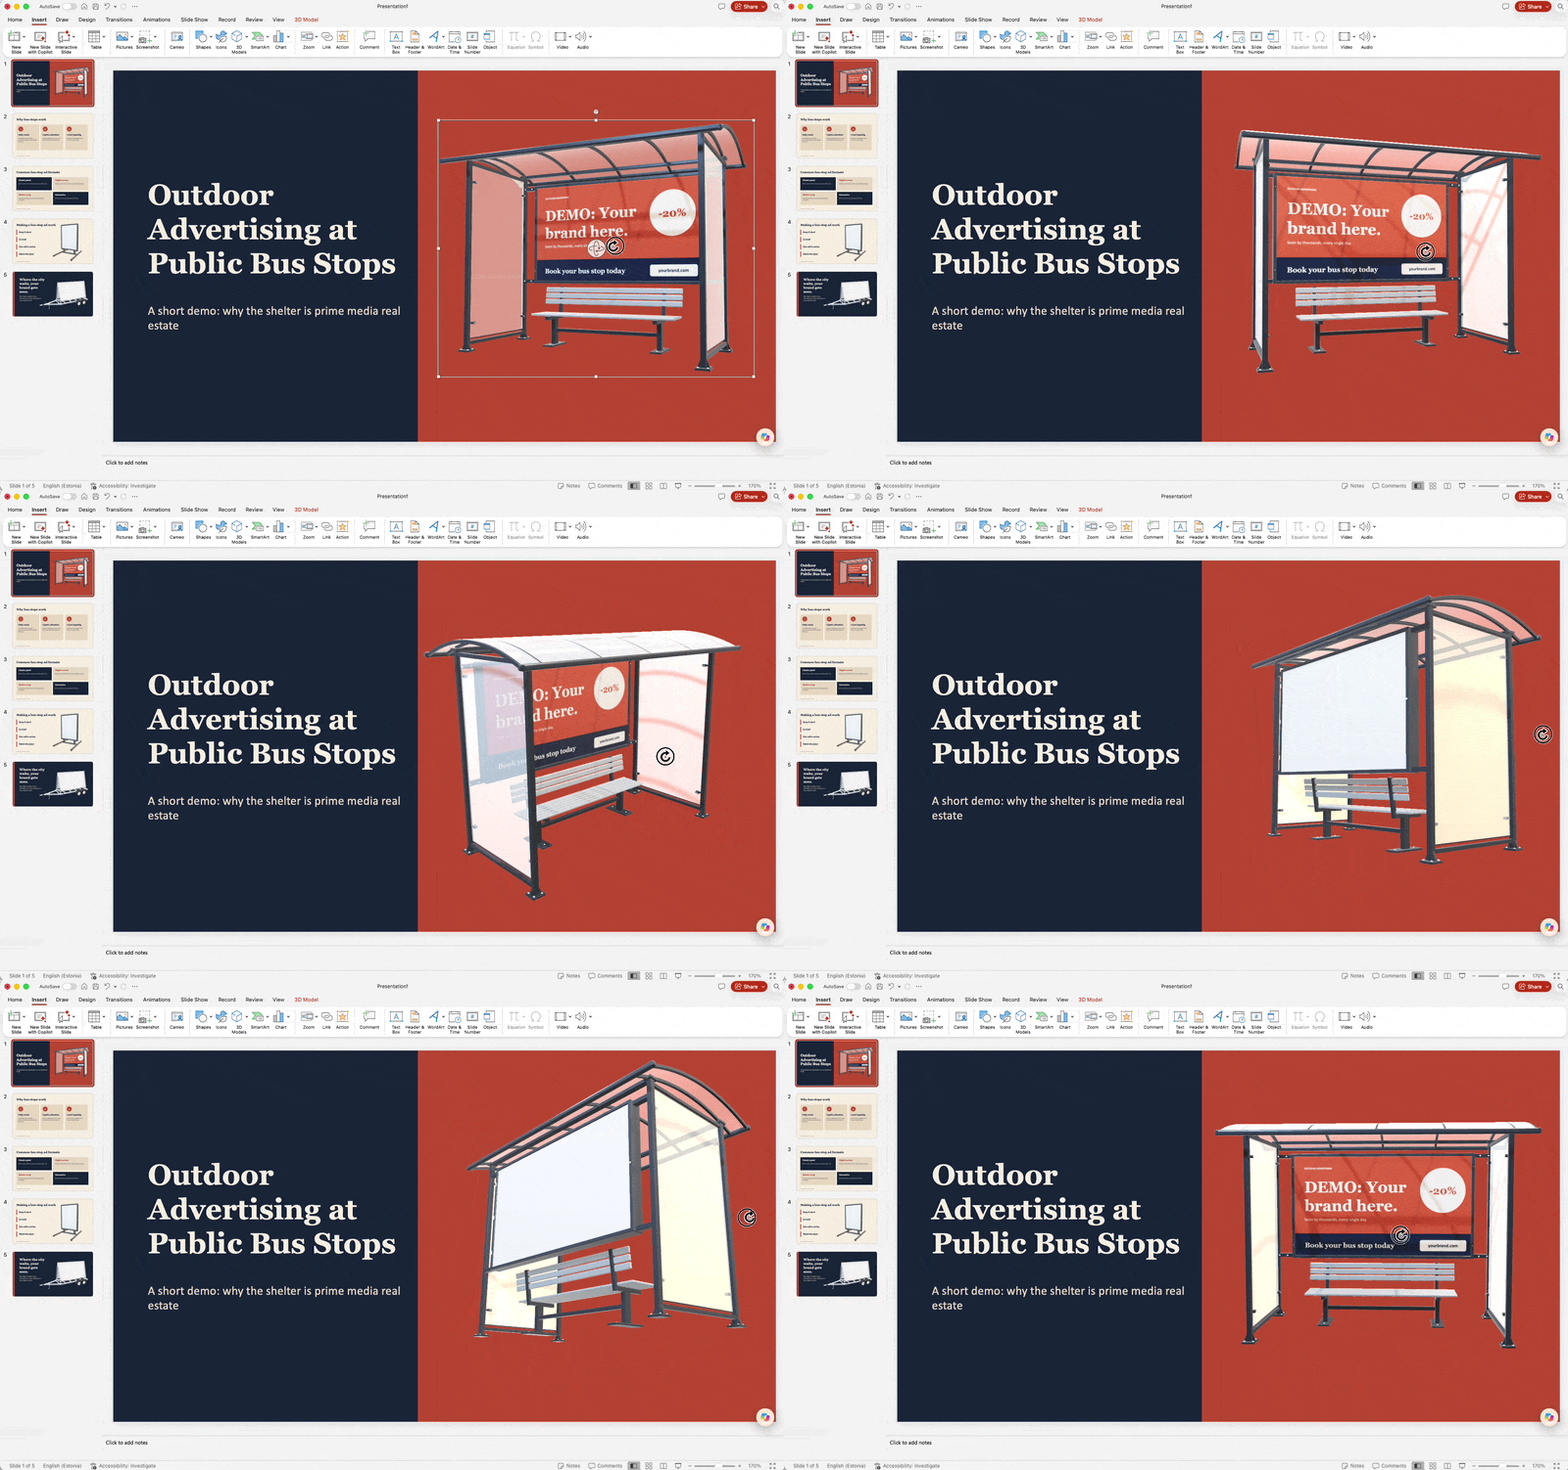 You can easily rotate a 3D model in PowerPoint and select any angle you like.
What can you do with a 3D mockup in PowerPoint?
A regular mockup image shows one angle.
A 3D model lets you choose another angle inside PowerPoint, without going back to export a new picture each time.
That is super useful when the shape of the product matters as much as the artwork.
For a book pitch, you might show the front cover first and then reveal the spine later etc
For an app presentation, you could begin with an angled laptop view, then bring the screen forward when you discuss the interface.
However, PowerPoint is where you present the finished mockup.
Keep your editable design in Mockaps so you can return to it when the artwork changes.
Before you start
Use a desktop version of PowerPoint for Windows or Mac that supports inserting 3D models.
Feature availability depends on your version and subscription, so check that Insert → 3D Models is available (or simply drag and drop your GLB file)
Microsoft describes the supported workflow in Get creative with 3D models.
For the Mockaps export, you will need Pro access.
For these examples, try the Standing Hardcover Book mockup or the MacBook Pro 16 Inch mockup.
1. Add your artwork in Mockaps
First, open the mockup you want to use.
For the hardcover book, add your cover artwork and check how it sits on the model.
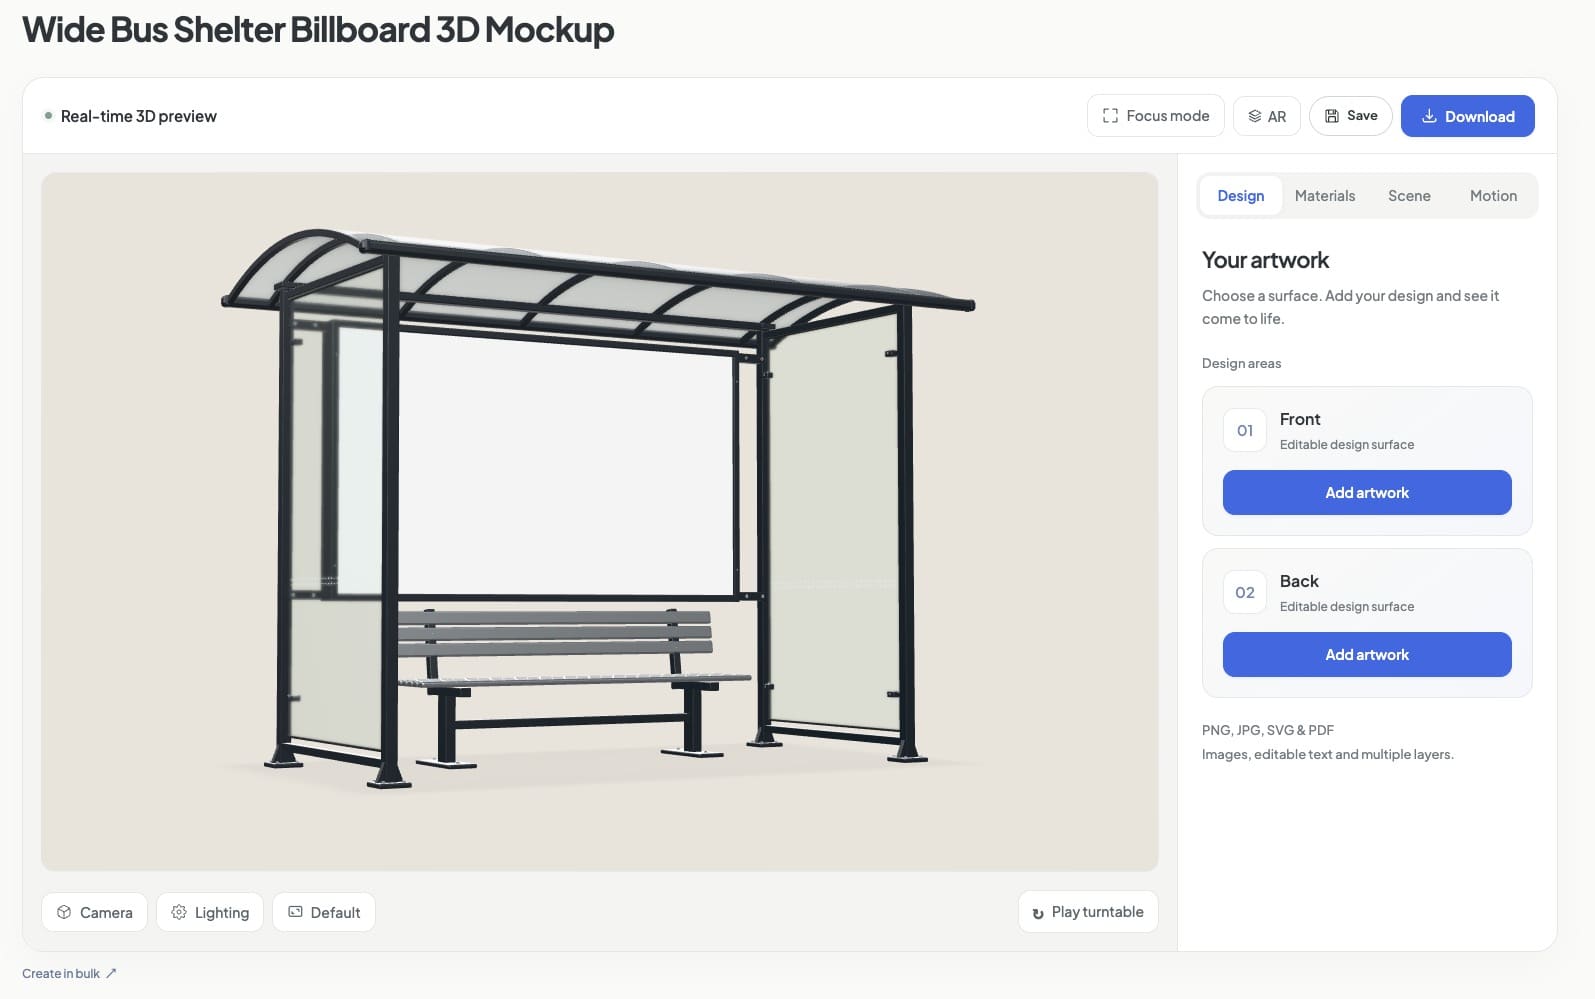
Then, rotate the preview to inspect the front, spine, and back.
If you are using the laptop example, place a screenshot of your app or website on the screen design area.
Next, check that the important details are large enough for an audience to understand.
A screen full of tiny text may look fine close up but become difficult to read on a presentation slide.
Finally, save your Mockaps project so you can reopen the editable design later.
2. Download the 3D model as a GLB
Open Download and choose GLB 3D model.
Then, wait for the file to finish preparing.
If the automatic download does not start, then use the prepared-file download option.
The GLB includes the model and your current artwork textures.
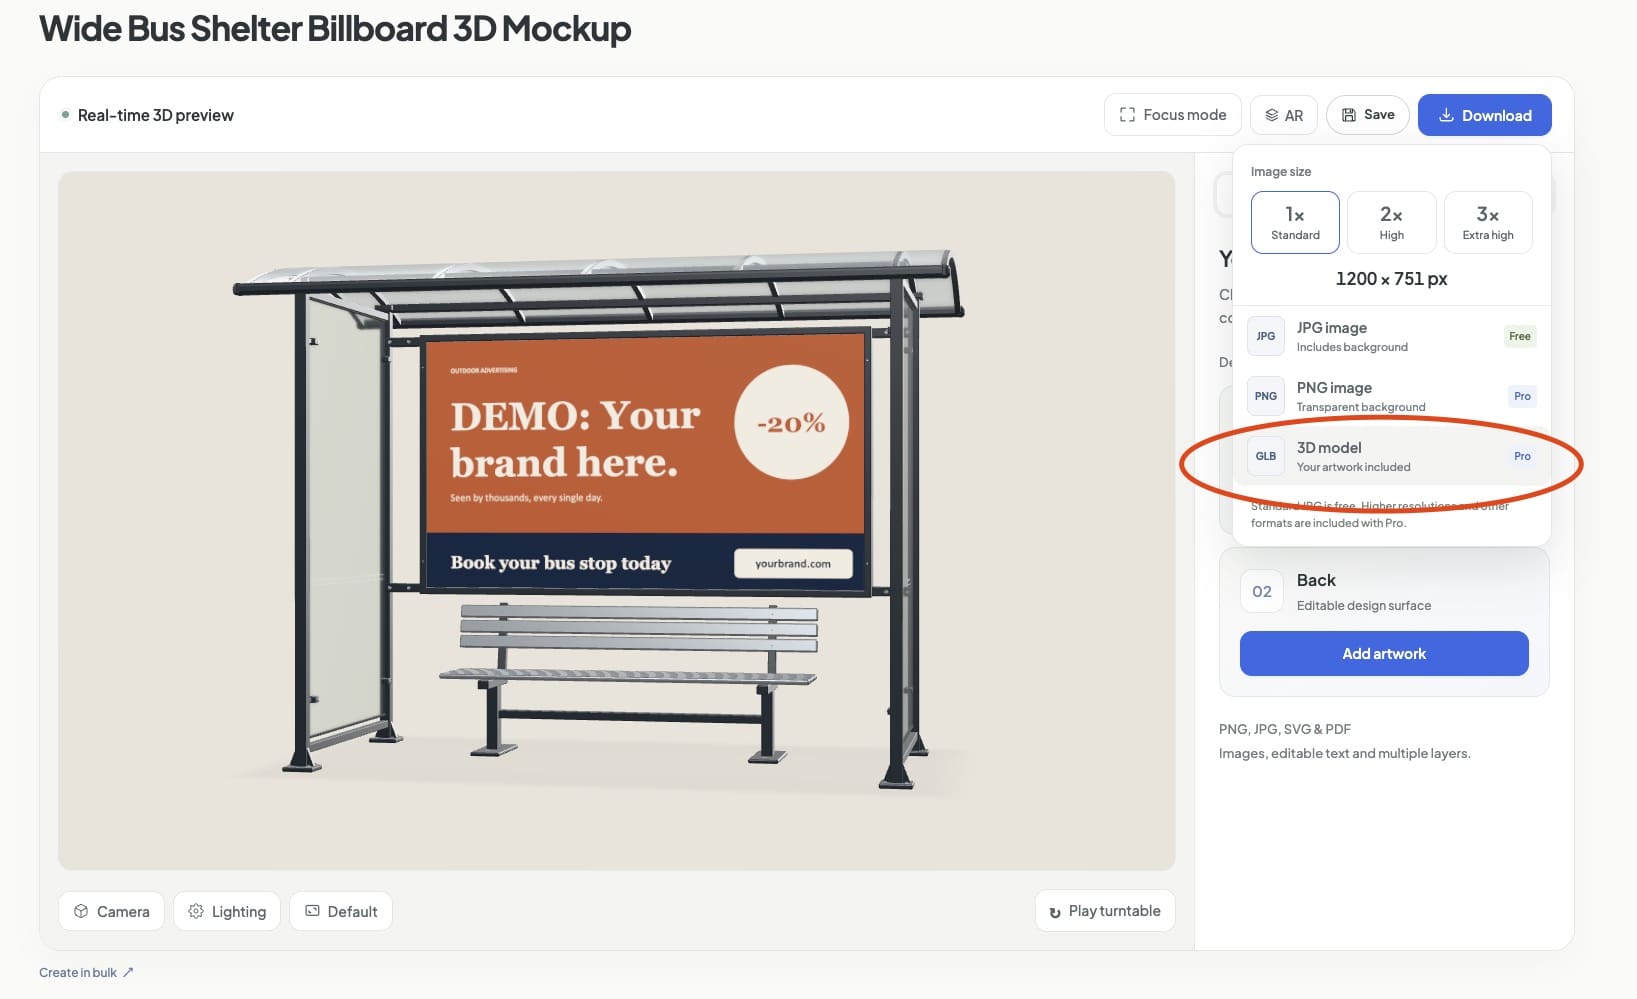
Microsoft recommends GLB for 3D content in Office, so you can use this file directly without converting it to FBX.
See Microsoft's guidance on GLB as the recommended Office 3D format.
3. Insert the mockup into your slide
Now, open your presentation in the PowerPoint desktop app and select a slide.
Choose Insert → 3D Models → From a File, or the local-device option shown in your version.
Select the GLB from Mockaps and insert it.
Use the 3D Models command for this step, rather than inserting the GLB as a picture.
Next, give the model a moment to load.
Start with a simple slide layout, such as a short title on one side and the product on the other.
For example, a book launch slide could pair the cover with the title, author, and release date.
4. Choose an angle and arrange the slide
Select the model and drag its central 3D control to turn or tilt it.
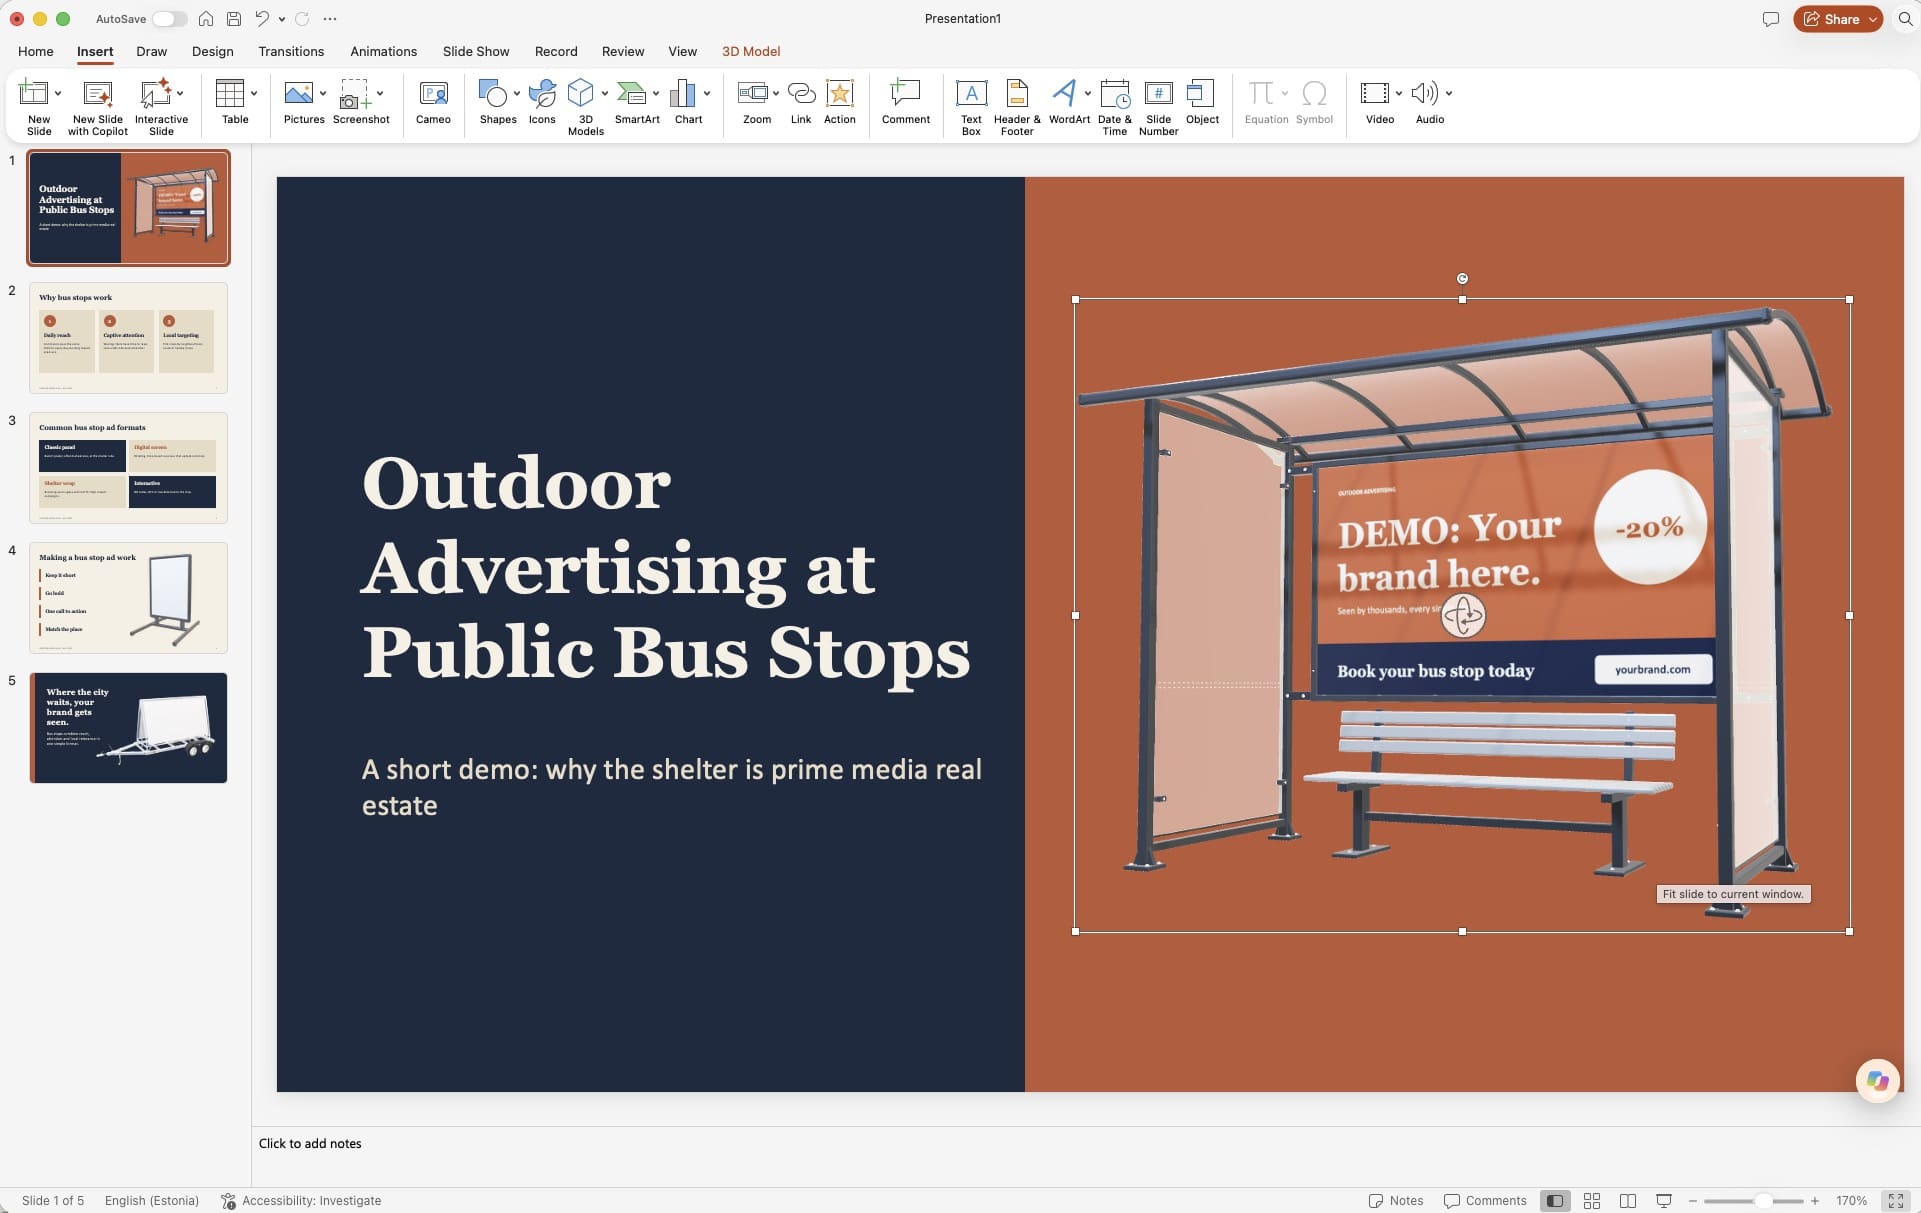
Next, drag a corner handle to resize it.
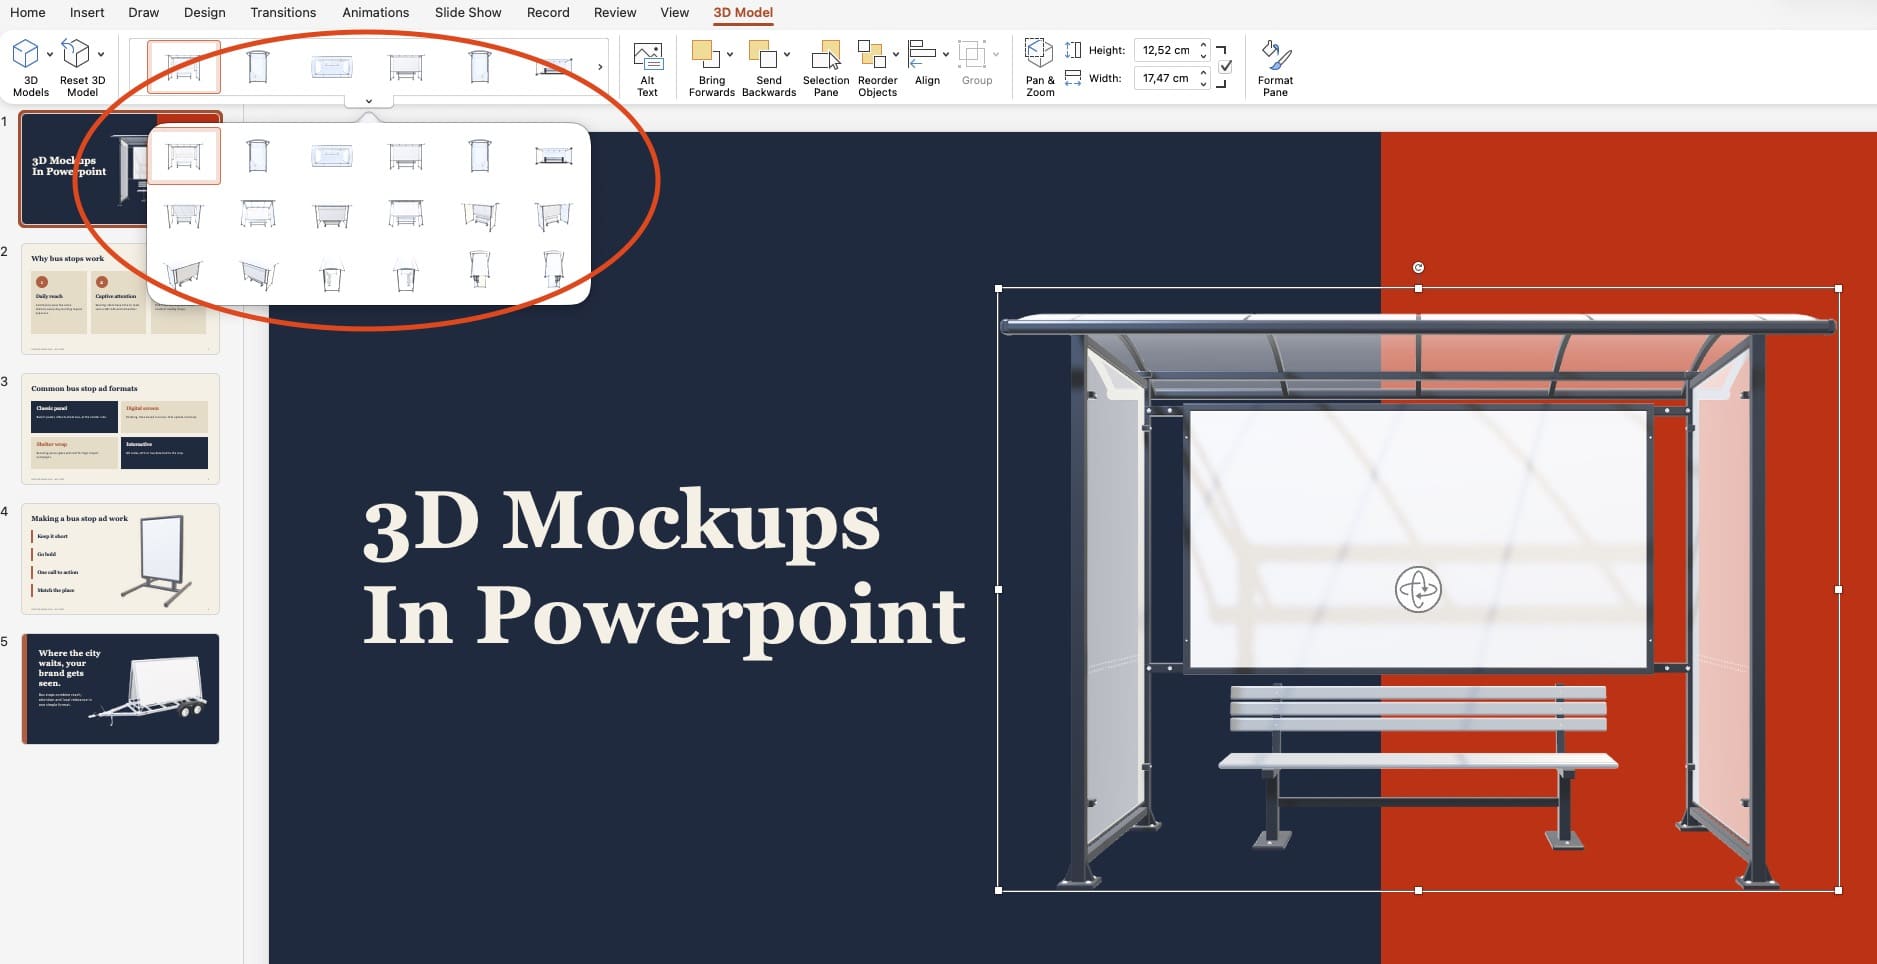
The 3D Model Views gallery also offers preset angles.
If you need to adjust how the product sits inside its frame, use Pan & Zoom.
These controls are covered in Microsoft's 3D model guide.
For a hardcover book, try an angle that shows the cover and a little of the spine.
For a laptop, keep the screen readable instead of turning it too far away from the audience.
Then, add your slide text around the product.
Leave enough space between the model and the text so each has a clear role.
5. Use Morph to move between two views
If your PowerPoint version includes Morph, you can use it to move smoothly between two views of the same model.
First, finish the starting view on your slide.
Then, duplicate that slide.
On the duplicate, keep the existing model and change its angle, size, or position.
For example, show the book's front cover on the first slide, then turn it slightly to reveal the spine on the second.
Next, select the second slide and choose Transitions → Morph.
Use Preview to check the result.
Duplicating the slide helps you keep the same object across both slides.
For more about this workflow, see Microsoft's Morph tips and tricks.
Keep the movement purposeful, such as revealing a design detail or bringing the laptop screen closer when it becomes the focus.
6. Add an optional 3D animation
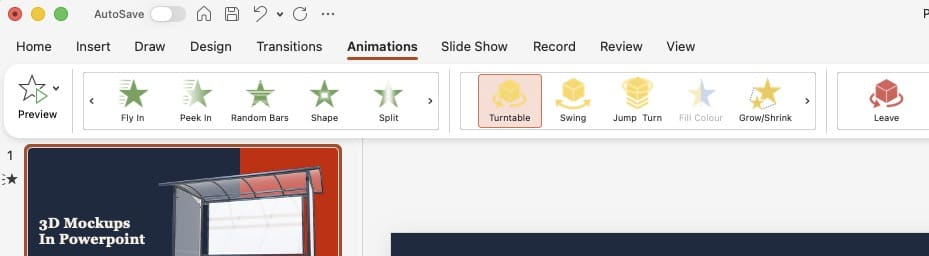
Some PowerPoint versions also provide dedicated animation effects for 3D models.
Microsoft documents effects such as Turntable, Swing, and Jump & Turn as Microsoft 365 features, with availability depending on the platform and version.
If these effects are available, select your model, open Animations, and choose an effect.
Then, use Effect Options to adjust the available movement settings and choose Preview.
See Microsoft's 3D animation requirements and instructions if the effects are missing.
For a product pitch, try one short movement before the slide settles into a readable view.
You do not need constant motion to make a 3D mockup useful.
7. Save and test the presentation
Finally, save your presentation as a .pptx file.
Run the slide show from the beginning of your mockup sequence.
Check that the artwork is readable, the movement supports your explanation, and the model does not cover any text.
Then, test the presentation on the computer and PowerPoint version you will actually use.
This is especially helpful when you are presenting from someone else's laptop.
Keep a still-image version of the key slides as a fallback if the presentation setup is uncertain.
When should you use an image or video instead?
Choose a GLB when you want to change the product angle or use PowerPoint's 3D controls.
Choose a PNG when you already have the exact view you want and need a simple still visual.
For example, a transparent PNG can work well beside a quote or a short list of product features.
Alternatively, export a video from Mockaps when you want to preserve a specific animated sequence.
This also lets you keep the camera movement and scene appearance you prepared in Mockaps.
Use a video format supported by your PowerPoint version, then test playback before presenting.
Frequently asked questions
Can I insert the GLB in PowerPoint for the web?
Microsoft currently directs users to the desktop app to insert 3D graphics.
Start in PowerPoint for Windows or Mac, then test the result if you plan to present through a browser.
Web playback and authoring do not offer the same features, as explained in Microsoft's 3D graphics support guide.
Can I edit the cover text or screen artwork in PowerPoint?
Your Mockaps artwork is included as textures on the model.
It does not become editable PowerPoint text or separate design layers.
To change the cover or screen design, reopen your Mockaps project, update the artwork, and download a new GLB.
Then, replace the model in your presentation and check its positioning and animation again.
Will it look exactly like the Mockaps preview?
The GLB carries the model, materials, and artwork, but it does not include the entire Mockaps scene.
PowerPoint renders the model in its own way and so lighting and reflections may look different.
The Mockaps background, environment, and camera setup are not transferred as a finished PowerPoint slide.
If matching the preview is more important than changing the angle, use an exported image or video.
Will my Mockaps turntable animation appear automatically?
A turntable or camera animation created in the Mockaps editor does not transfer as a ready-made PowerPoint animation.
Instead, create movement in PowerPoint with the available tools, or use a video export to keep the sequence you already made.
Some templates may include built-in model animation clips, but their playback depends on what the receiving app supports.
What if the presentation feels slow?
First, try a slide with just one 3D mockup.
Then, remove unnecessary copies and test again on the presentation computer.
If a particular slide only needs one fixed view, replace that model with a still image.
This gives you a useful mix of 3D product views and simpler supporting slides.
KEEP EXPLORING
Need a hand with this guide? Ask a question ↗